
How to create a newspaper with free Canva templates: a step-by-step guide
If you’re looking to create a newspaper using Canva, you’re in the right place. We've been helping creative folks design and print custom...
Your newspaper is hot off the press and you can’t wait to share it with the world.
Whether it's client work to add to your online portfolio or a personal project you're excited to show off on social media, it's worth the extra effort to get a great photo. After all the time and creativity that went into making your newspaper, you don’t want your image to end up with flat colours or wonky shadows.
Luckily, we have an expert to explain how to capture your newspaper looking its best (and no, you don’t need any fancy equipment!)
Photographer Richard Gaston has shot for clients including Monocle, Wallpaper*, British Airways — and us! Every month, he photographs the newspapers featured in our print roundup and he’s mastered the art of the newspaper close-up.
In this guide, Richard walks through the 6 steps to set up a DIY photo studio at home and shares the tricks he’s learned to take flat lay newspaper shots to the next level.
• Step 1: Find your light
• Step 2: Choose your background
• Step 3: Set the scene
• Step 4: Level up (with plinths)
• Step 5: Shoot your shot
• Step 6: Edit and organise
• Bonus: Make it move! How to create an animated GIF of your newspaper
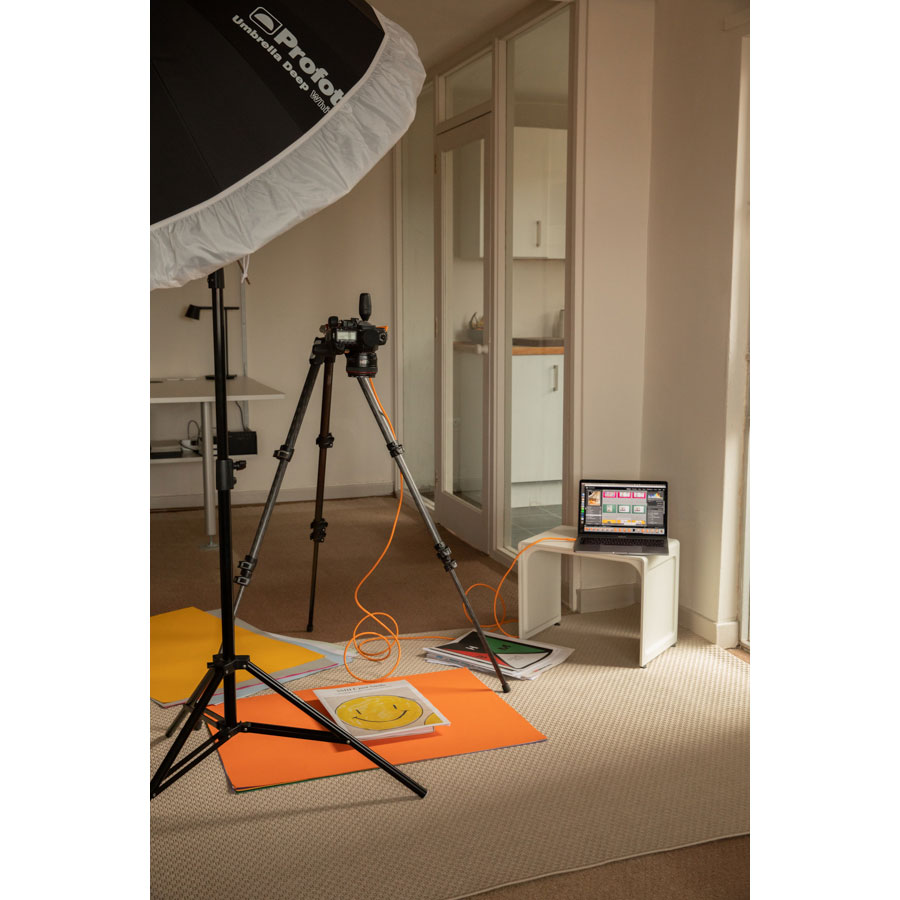
First, find your light source. If you’re using a flash, then set up in an area with maximum space for you to move around. For Newspaper Club’s photos, I use one Profoto B10 flash head with an umbrella. I position the flash to the top right of the newspaper at around 1.5 meters high.
If you’re using natural light, choose an area near a window that offers non-direct light. Overcast days are best, when the light will be soft, even and consistent throughout the images you take. It’s important to keep your lighting consistent if you plan to present the images together.
Aim to shoot during the brighter parts of an overcast day (typically between 10am and noon). Remember that if the window is to the left of the newspaper, then you’ll have a shadow on the right of the newspaper. You can shift the position of the newspaper to adjust where the shadow falls. (Just remember, as mentioned above, to keep it consistent across a series.)
Step 2: Choose your background
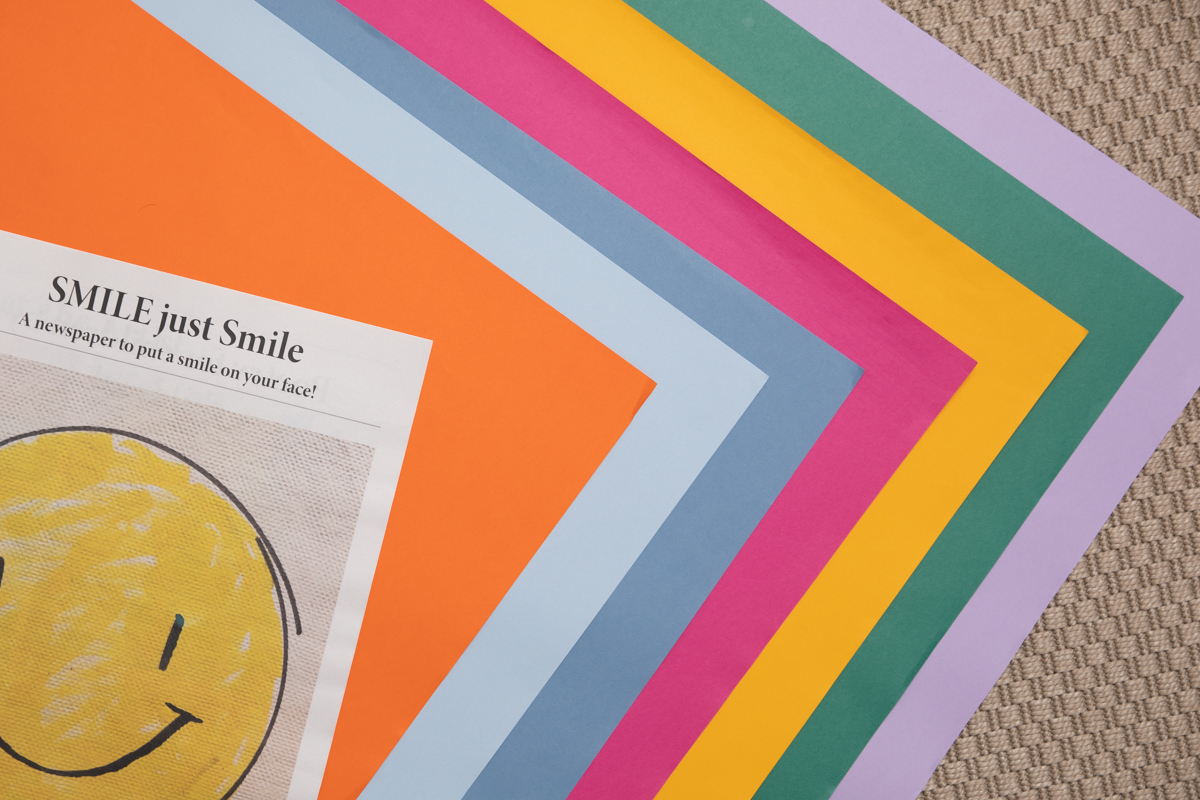
Use a sheet of background paper that’s large enough to fit the newspaper with plenty of room for a border. For Newspaper Club’s images, I use Colorplan A1 paper from Fred Aldous in different colours (about £2 each).
Here's how our 3 formats — mini, tabloid and broadsheet — fit on an A1 background:
Choose a background colour that complements the colours in the newspaper. For example, a background with similar tones or one that pulls out a specific colour in the newspaper.
Put the background paper on a flat surface on the floor — this makes it easier to get the camera high enough above it — near the window or flash. Tape it down if necessary to smooth out any creases and prevent it from moving around between shots.
If you don’t have paper to use for backgrounds, improvise with whatever’s available: a (well-ironed!) sheet, wooden floor or clean tabletop can all work well.
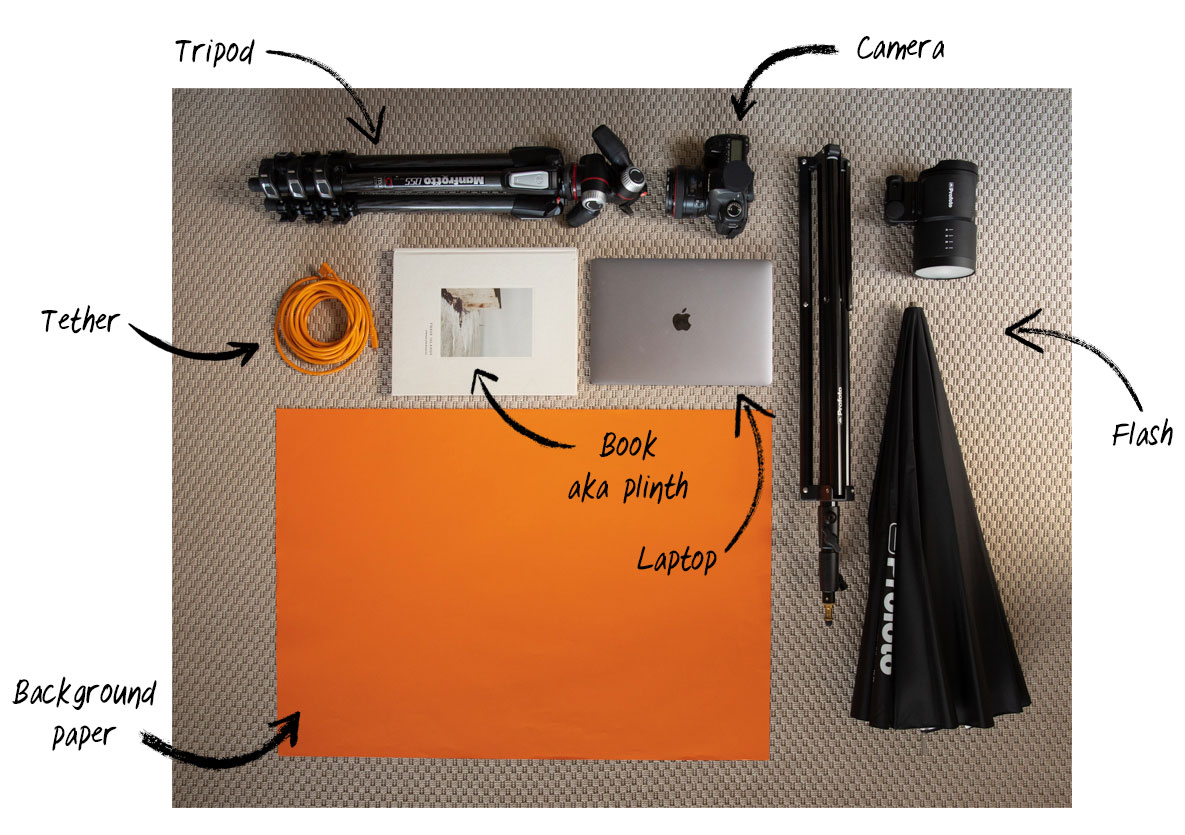
When you’re ready to shoot, make sure you have all your equipment handy (that’s my gear above). I recommend using a tripod — it adds stability so you can get super sharp images and will help keep your images consistent throughout the shoot. Some professional tripods have an extendable horizontal arm which is designed for this arrangement.
To make a DIY tripod, Creative Lives in Progress suggests a @shittyrigs-style approach of balancing a long stick like a broom handle on the back of two chairs and taping your camera to the middle of it (“It looks ugly but it works.”)
Step 4: Level up (with plinths)
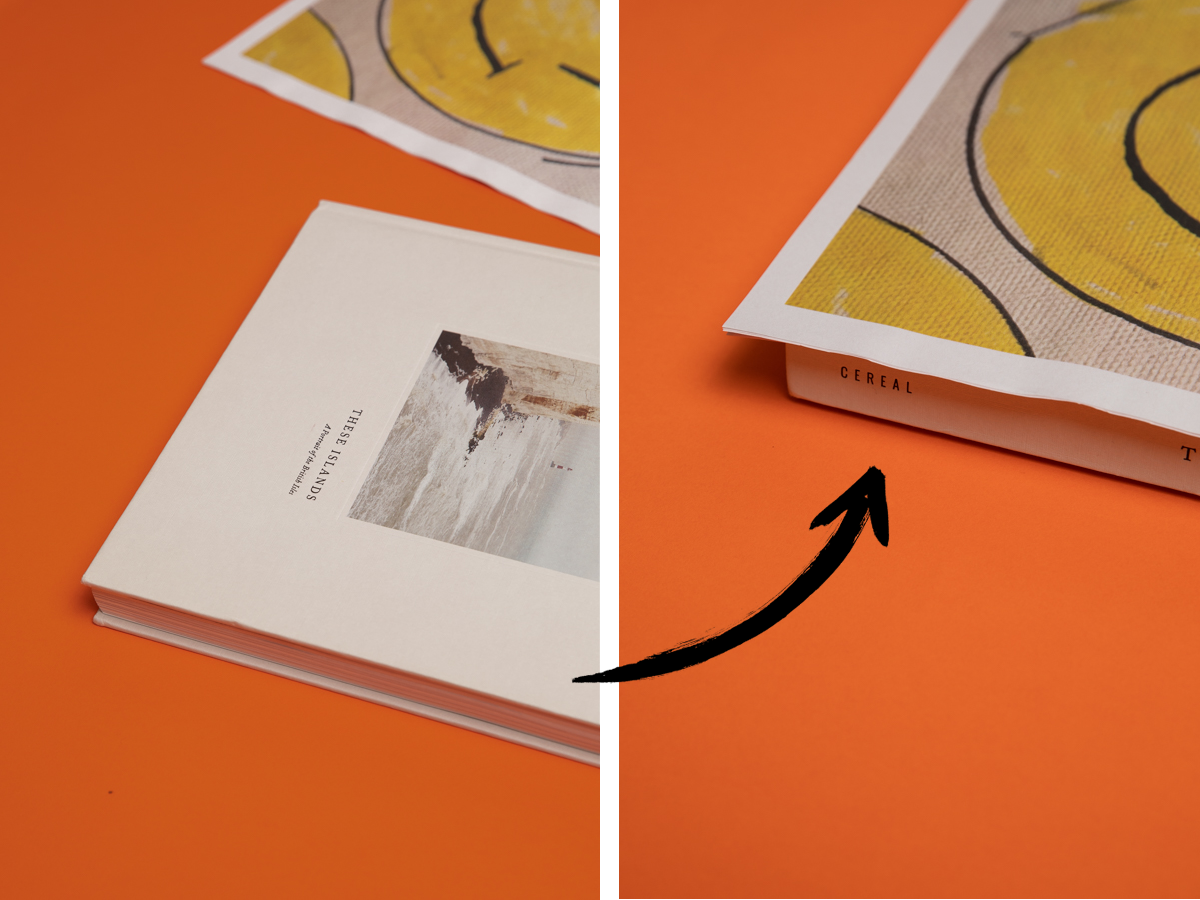
Elevating your newspaper off the background is a simple and effective way to add depth to your image. I use books in varying sizes to create a plinth that lifts up the newspaper and creates a shadow below.
Here’s a before and after animation that shows the power of a plinth:
Look for a book that is just smaller than the newspaper so it doesn’t peek out from underneath. I typically use a book that is 4cm - 6cm thick. (Remember you can stack two on top of one another or side by side to get the right fit and height.)
If you’re shooting multiple newspapers, using a plinth can also help you make sure you’re shooting them all in a consistent position. I’ll typically shoot Newspaper Club’s images in batches, doing all the covers first using one plinth before changing to a set up for the inside spreads, which require two plinths (one for each side).
If you’re using a DSRL, be sure to keep the focal length of your lens consistent throughout the shoot. I shoot at an aperture of f/8, ISO 100 and adjust the shutter speed according to the lighting conditions. If you’re using a tripod, you’ll be able to use a slower shutter speed and the image will still be sharp.
Make sure your image isn’t too dark or too bright. Use the histogram found on most cameras to determine if your photo is over- or under-exposed, so you can better capture the subtle textural details of your newspaper.
If you’re using a phone camera, press and hold the screen on the object you want to be in focus (the newspaper) and slide your finger up or down to increase or decrease the exposure. There are two handy histogram phone apps: the Photo Extension Histogram app, which lets you view a histogram for images in the Photos app, or you can use the Lightroom CC for mobile.
For comparison, here’s a photo taken with my DSRL using a flash (top) and a photo taken with my iPhone using natural light (bottom):
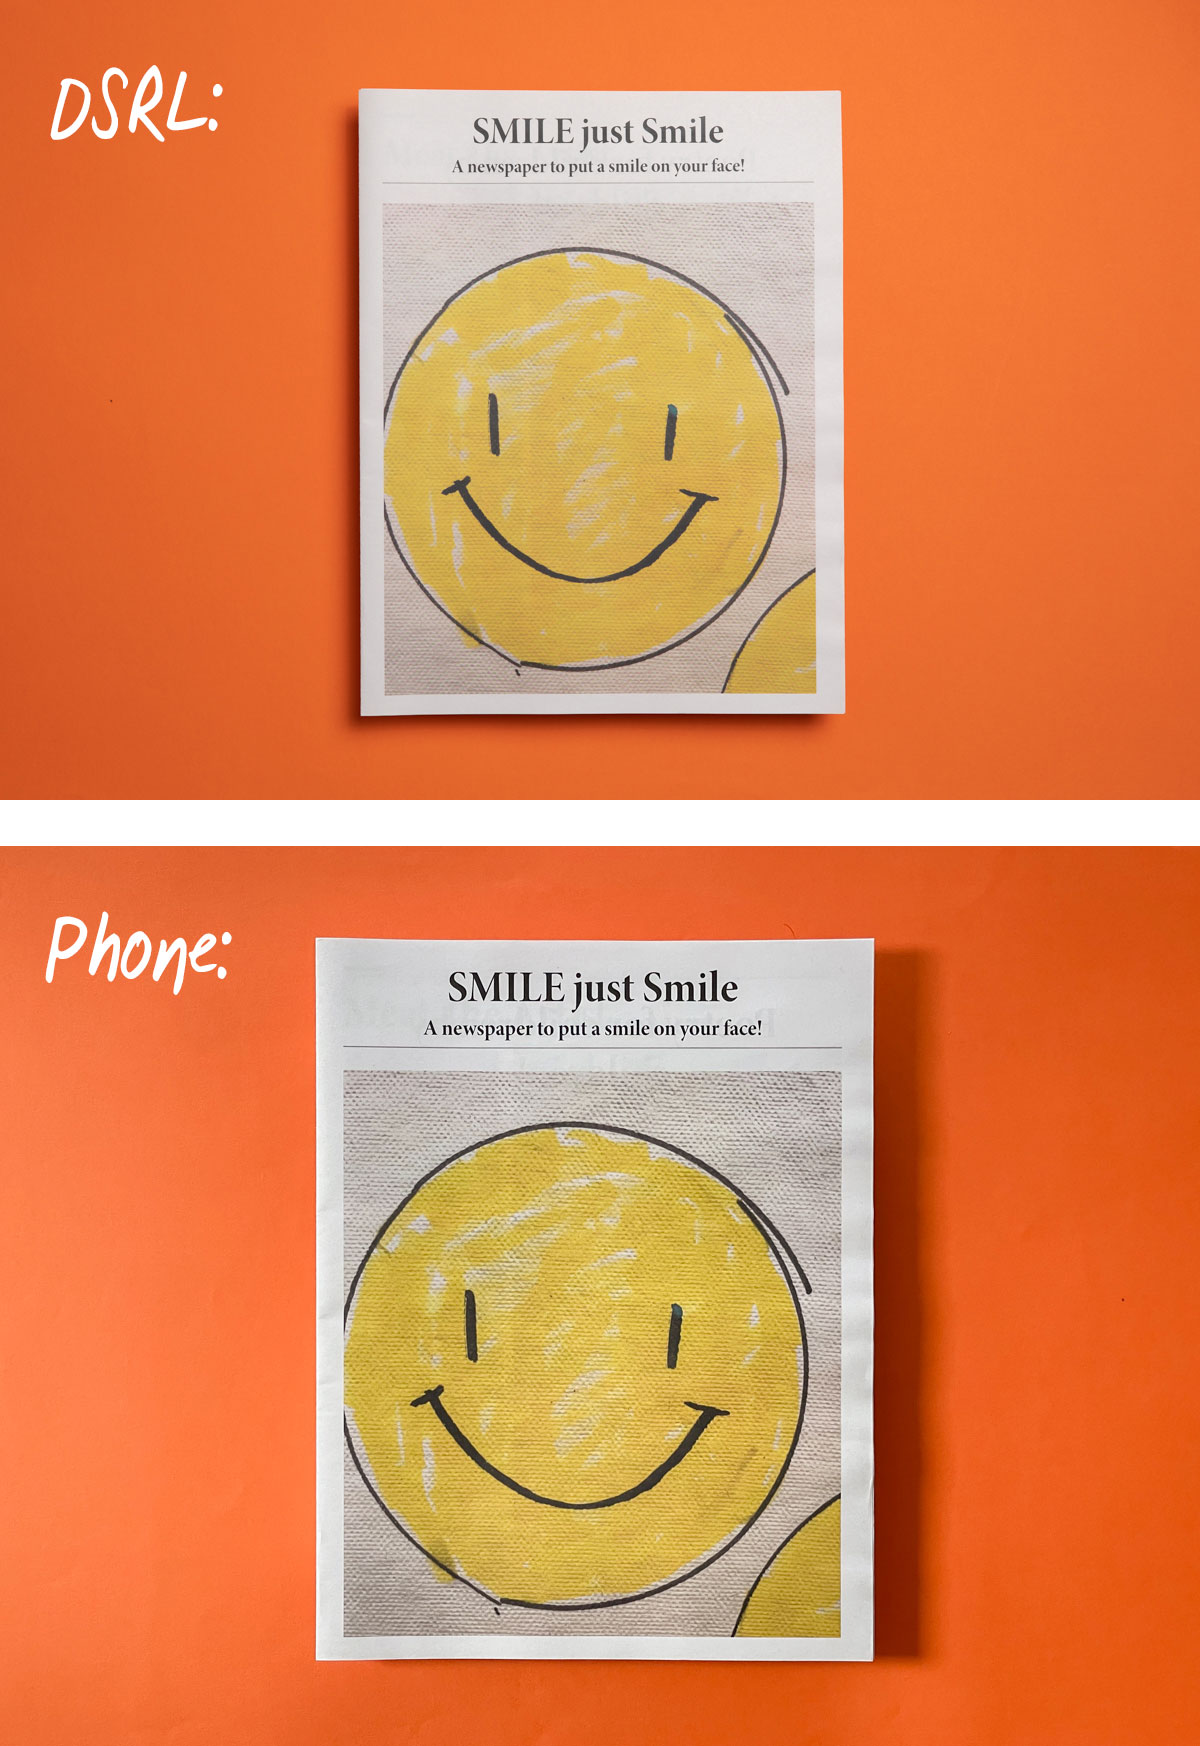
(Note: The shadow swaps sides in the photos above because in the DSLR photo the light source is coming from my flash — on the right — and in the phone photo it's coming from my window — on the left.)
A tether cable from your camera to your laptop can be helpful here — it lets you see your photos on a larger screen immediately, so you can spot anything that doesn’t look right.
If you’re working with a phone camera, you can use Airdrop to transfer the images to your computer so you can see them at a bigger size.
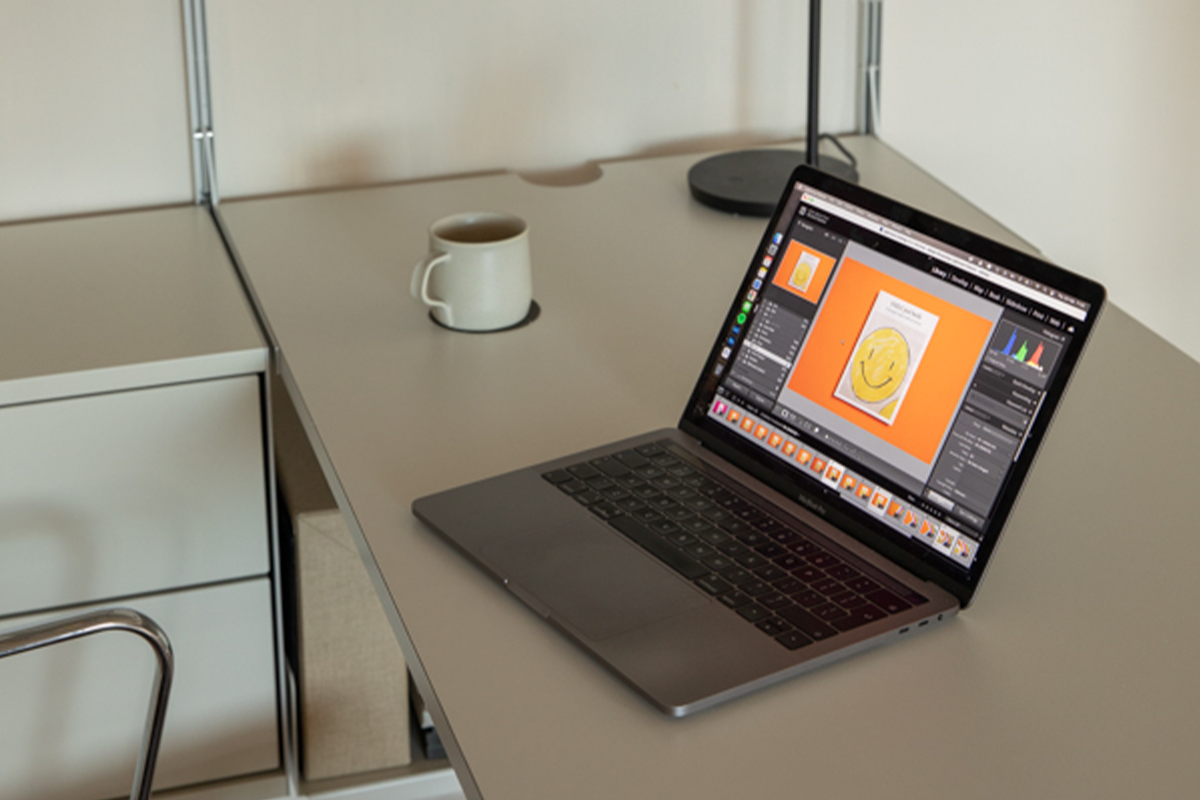
After I’ve finished shooting, I make final adjustments to the images with editing software (and a cup of coffee). I use both Adobe Lightroom and Photoshop to edit my photos.
First, I upload the images into Lightroom and apply the same crop to every image to make sure they all remain within ratio: I select all the images that need cropping (by holding command or shift). Click ‘Sync Settings’ on the bottom right and then make sure no boxes are ticked apart from ‘Aspect Ratio’ under the ‘Crop’ option. (Note: A quick way to deselect the boxes is to click, ‘Check None’ in the footer.)
Here's a quick video showing what I do:
Lightroom is also a great software for organising and archiving your photos. It automatically creates folders using dates for every upload. I find it useful to rename these and organise them in groups, for example by place or project title.
Next, I apply any retouching to the images using Photoshop. I remove any blemishes — like creases or flecks of dust on the paper — using the spot healing brush or the clone stamp tool. (This video is a good introduction to using the clone stamp if you’re new to it.)
Here's a video of my process:
If you don’t have Lightroom or Photoshop, GIMP is a great open-source photo editor and Techradar has more suggestions for free alternatives.
After you've taken fabulous images of your newspaper following the steps above, you can stitch the shots together to create a seamless animation flipping through your newspaper — like this:

In our separate guide to making an animated GIF of your newspaper, we walk through the 8 steps to turn a series of still shots into a moving masterpiece.
Further resources
Read. A guide to photographing your work with limited resources. Creative Lives in Progress explores some playful ways of documenting your printed work: "Don’t feel like you need to only shoot it straight on...If you chose a thin and lightweight paper, it might be interesting to deliberately show the print gently folding over itself. Show the piece as an object." We've seen our customers play with movement in their photos and it can look great.
Watch. Tips for photographing your design work. In this video, designer Hollie Arnett talks about how (and why) to take a variety of photos of your printed pieces to "tell the story of the work."
Make your own newspaper with Newspaper Club. Print runs start at 1 copy!
If you’re looking to create a newspaper using Canva, you’re in the right place. We've been helping creative folks design and print custom...

Weddings are full of stories – how you got engaged, why you chose your venue or the flowers in your bouquet and all the little decisions...

So much thought goes into every part of your wedding, from the venue to the playlist to the colour of the napkins. But there’s only so...